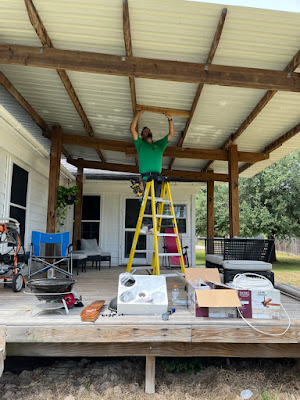
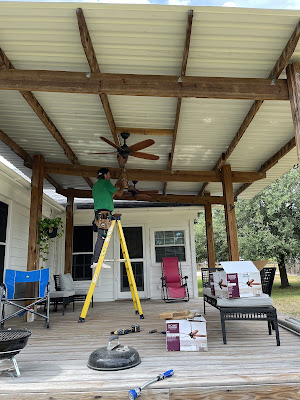
Installing an outdoor ceiling fan for your Magnolia, TX home or business can be a great way to keep your outdoor living spaces more comfortable during hot weather. It's recommended to us a Licensed Electrician in Magnolia, TX but if your handy, here's a step-by-step guide to help you with the installation:
**Materials and Tools You'll Need:**
1. Outdoor-rated ceiling fan
2. Ceiling fan mounting bracket
3. Downrod (if needed)
4. Mounting screws and anchors
5. Wire nuts and connectors
6. Screwdriver
7. Wire stripper
8. Wire cutter
9. Circuit tester
10. Ladder
11. Pliers
12. Adjustable wrench
13. Outdoor-rated electrical box and conduit (if not already
in place)
14. Silicone caulk (outdoor-rated)
15. Waterproof sealant
**Installation Steps:**
1. **Safety First**: Turn off the power to the circuit
you'll be working on at your electrical panel. Confirm the power is off by
using a circuit tester on the wires you'll be connecting. Use an electrician in Magnolia, TX if you're not comfortable with the electrical panel.
2. **Prepare the Electrical Box**: Ensure that your
electrical box and conduit are outdoor-rated and properly installed. If not,
consult an electrician in Magnolia, TX to make sure you have the correct setup.
3. **Assemble the Fan**: Follow the manufacturer's
instructions to assemble the ceiling fan and attach the blades. If you need to
use a downrod, attach it as well.
4. **Mounting Bracket**: Secure the mounting bracket to the
electrical box on the ceiling using the provided screws and anchors. Make sure
it's firmly attached.
5. **Hang the Fan**: Lift the fan assembly and hook it onto
the mounting bracket. Follow the manufacturer's instructions for this step, as
it can vary from fan to fan. Most fans have a hook or hanger that allows you to
hang the fan while you make the electrical connections.
6. **Electrical Connections**:
a. Connect the
fan's wires to the corresponding wires in the electrical box. Typically, this
involves connecting the black or red (hot) wire, white (neutral) wire, and
green or bare wire (ground). Follow the manufacturer's instructions for your
specific fan.
b. Use wire nuts
and connectors to secure the connections, and wrap them with electrical tape.
7. **Secure the Fan**: After making the electrical
connections, use the provided screws to secure the fan to the mounting bracket.
8. **Install the Blades**: Attach the fan blades to the fan
motor following the manufacturer's instructions.
9. **Test the Fan**: Turn the power back on and test the fan
to ensure it's functioning properly.
10. **Final Steps**:
a. If your fan
comes with a light kit, attach it according to the manufacturer's instructions.
b. Seal any gaps
between the ceiling and the electrical box with outdoor-rated silicone caulk.
c. If the fan is
in an exposed outdoor location, consider applying waterproof sealant to the
electrical box and connections for added protection against the elements.
11. **Secure and Tidy Wiring**: Use cable ties or clips to
secure any excess wiring and make sure it's neatly tucked away.
12. **Safety Check**: Ensure all components are secure and
the fan is operating correctly. Double-check the fan's balance and adjust the
blades if necessary.
Remember that this is a general guide, and the specific
installation process may vary based on the manufacturer's instructions and the
type of outdoor ceiling fan you're installing. If you're unsure about any step
or not comfortable working with electrical connections, it's a good idea to
hire a professional electrician in Magnolia, TX to do the installation for you. Safety is
paramount when working with electricity, especially in outdoor conditions.
Your electrician should be experienced and licensed to work in Magnolia, TX. Outdoor ceiling fans can be tough for some to install on your own. Leave it to the professionals at Logo Electrical Services! We’ve been in the business for over 45 years, and we only hire the top licensed Electricians Magnolia, TX.


Comments
Post a Comment